FlamePOS Installation Guide
1. Purpose
This guide describes how to install FlamePOS version 1.1.0-VSMS-1.0.0, configure the runtime environment, connect the database, configure printers, and prepare VSMS connectivity for TaxCore E-SDC or V-SDC communication.
2. Installation Package
The installation package should contain the following files and folders:
flamepos.jaror the approved executable package for version 1.1.0-VSMS-1.0.0.lib/application dependency folder, if supplied separately.config/folder containing receipt templates, icons, printer layouts, and database configuration.i18n/folder containing application messages.- Database setup or migration files required by the release.
- Release notes and checksums for the submitted version.
3. System Requirements
| Component | Requirement |
|---|---|
| Operating system | Windows or Linux desktop environment approved by the installer. |
| Runtime | Java runtime compatible with the released FlamePOS build. Java 8 is commonly used by this application family. |
| Memory | Minimum 4 GB RAM recommended for POS terminal use. |
| Storage | At least 2 GB free storage for application files, logs, receipt templates, and local database files where applicable. |
| Network | Network access to the configured database and selected TaxCore E-SDC or V-SDC endpoint. |
| Printer | 80 mm thermal receipt printer configured in the operating system and available to the POS user account. The fiscal receipt layout is 226 points (approximately 79.7 mm) wide. For sandbox evidence, a configured PDF or preview printer may be used where accepted by the reviewer. |
4. Pre-Installation Checklist
- Confirm taxpayer/business details for the installation.
- Confirm the TaxCore Developer Location and certificate identity. The submitted location type is Headquarters and its location name is
Wok & Flame. - Confirm the POS terminal identifier.
- Confirm receipt printer name and paper width.
- Confirm database server, database name, username, and password.
- For E-SDC, obtain the endpoint and assigned card PIN. For V-SDC, obtain the HTTPS endpoint, PAC, and PKCS#12 client certificate/password.
- Confirm that the FlamePOS version is exactly
1.1.0-VSMS-1.0.0.
5. Install Java Runtime
- Install the approved Java runtime for the release.
- Open a terminal or command prompt.
- Verify Java is available:
java -version
Record the Java version in the installation checklist.
6. Install FlamePOS
- Create an application folder, for example
C:\FlamePOSon Windows or/opt/flameposon Linux. - Copy the approved FlamePOS installation package into the folder.
- Ensure the folder contains the application JAR, configuration folders, receipt templates, and dependencies.
- Set file permissions so that normal POS users can run the application but cannot modify sensitive configuration without authorization.
7. Database Configuration
Configure the database connection according to the selected database provider. The application configuration includes database host, port, database name, username, password, and connection string settings.
Example fields to verify:
- Database provider name.
- Database URL or host.
- Database port.
- Database name.
- Database username.
- Database password.
8. VSMS / TaxCore Configuration
Select and configure one signer for the installation:
- Set
vsms.sdc_type=ESDCfor local/Dev E-SDC, orvsms.sdc_type=VSDCfor virtual SDC. - For E-SDC, set
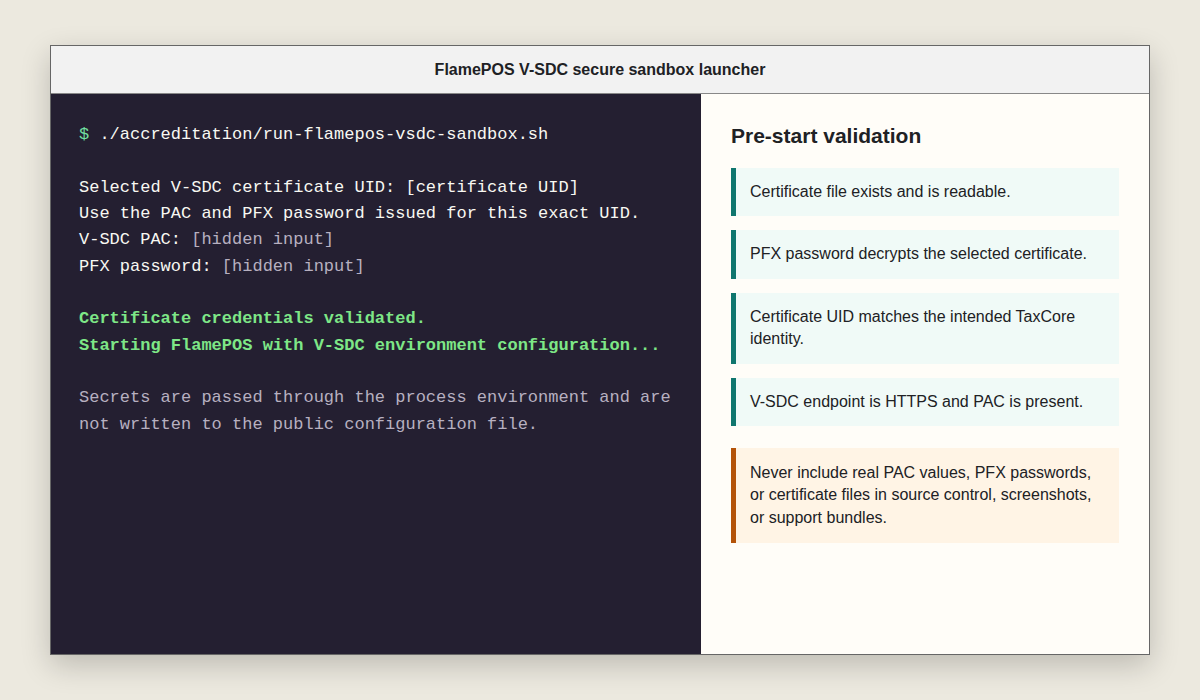
vsms.esdc.base_urlandvsms.esdc.pin. - For V-SDC, configure the HTTPS endpoint and certificate path. Supply PAC and certificate password through
protected environment variables
FLAMEPOS_VSMS_VSDC_PACandFLAMEPOS_VSMS_VSDC_CERTIFICATE_PASSWORD. - Timeout and failure-handling settings.
- Sandbox or production mode.
E-SDC mode performs PIN activation and sends no PAC header or client certificate. V-SDC mode requires HTTPS mutual TLS and PAC and does not perform PIN activation. FlamePOS does not automatically fall back to the other signer. Use sandbox credentials only for testing. Production credentials must be installed only in the production environment and must not be committed to source control or included in public support packages.
9. Printer Setup
FlamePOS version 1.1.0-VSMS-1.0.0 supports fiscal receipt printing on thermal paper in the 57 mm to 80 mm category, using a layout designed for an 80 mm paper roll. Paper rolls up to 57 mm and A4 fiscal invoice output are not part of this configuration.
- Install the receipt printer in the operating system.
- Print an operating system test page if available.
- Open FlamePOS printer configuration.
- Select the receipt printer for fiscal receipt output.
- Select kitchen and report printers if used.
- Print a POS test receipt and verify alignment, QR readability, and required receipt fields.
Production installations should use an actual receipt printer suitable for customer receipts.
10. First Launch Verification
- Start FlamePOS.
- Confirm the About screen or title shows version
1.1.0-VSMS-1.0.0. - Log in using administrator credentials.
- Open Back Office > Configuration > Business, configure any required local branding, and save.
- Confirm database connection and menu/PLU loading.
- Confirm receipt printer selection.
- Open Active TaxCore Tax Rates and verify the intended signer type and current status/tax-rate response.
- Create a normal cash sale in sandbox mode and verify the QR code, SDC taxpayer business name followed by the SDC location name,
POS Number
1083/1.1.0-VSMS-1.0.0, and END OF FISCAL INVOICE below the QR code. For the submitted Headquarters location, both identity lines readWok & Flame. Confirm that the verification URL is not printed as text. - Create a card sale using external/manual authorization code entry where no swipe device is connected.
- Create a refund that references the original sale fiscal invoice.
- Print a receipt copy and verify a TaxCore Copy invoice, copy marking, reference invoice, and QR code.
- Temporarily simulate selected-SDC unavailability in a controlled sandbox test and verify the sale is not finalized as a successful fiscal invoice and is not sent to the other signer.
11. Upgrade Notes
Before upgrading an existing installation, back up the database, configuration files, receipt templates, and logs. After upgrade, verify the application version and run a sandbox fiscal invoice test where applicable.
12. Uninstall
- Stop FlamePOS on the terminal.
- Back up operational data according to company retention policy.
- Remove application files only after required data has been archived.
- Revoke or remove local certificate files and sensitive credentials if the terminal is retired.